
Deploy an AI Agent leveraging Agent Identity as Hosted Agent to Microsoft Foundry
So you created an AI agent that can reason, invokes tools ,calls APIs and executes multiple tasks.
Now comes the most important question.. What's next ?
Creating an agent is only one part of the solution. This agent needs an environment where it can be hosted and clients can communicate with it.
This is where hosted agents in Microsoft Foundry become important and Azure CLI's help to deploy them to Foundry.
What are hosted agents in Microsoft Foundry ?
To define it in one sentence :
Hosted agent in Microsoft Foundry Agent Service is a containerized, code-based AI agent that you package and run on Microsoft-managed infrastructure.
Hosted agents differ from prompt agents where prompt agents are configured strictly through system prompts.
Here is how Microsoft defines hosted agents :
When you build agentic applications by using open-source frameworks, you typically manage many cross-cutting concerns: containerization, web server setup, security, memory persistence, scaling, instrumentation, and version rollbacks. These tasks become even more challenging in heterogeneous cloud environments.
Hosted agents in Foundry Agent Service solve these challenges for Microsoft Foundry users. Hosted agents call models from the Foundry model catalog to perform reasoning while your custom code handles orchestration. By using this managed platform, you can deploy and operate AI agents securely and at scale. You can use your custom agent code or a preferred agent framework with streamlined deployment and management.
When to use hosted agents
Hosted Agents are particularly useful when you need to:
- Bring your own implementation: Build agents using any framework including Microsoft Agent Framework
- Support custom protocols: Expose your agent through the Invocations protocol to handle webhooks, custom HTTP requests and payloads beyond the standard
OpenAIformat. - Configure compute resources: Define the CPU and memory requirements for your agent's execution environment.
- Support stateful execution: Persist files and application state across agent interactions using the
/filesendpoint. - Handle long-running workloads reliably: Preserve in-progress agent execution across process interruptions and replay streamed results when clients reconnect.
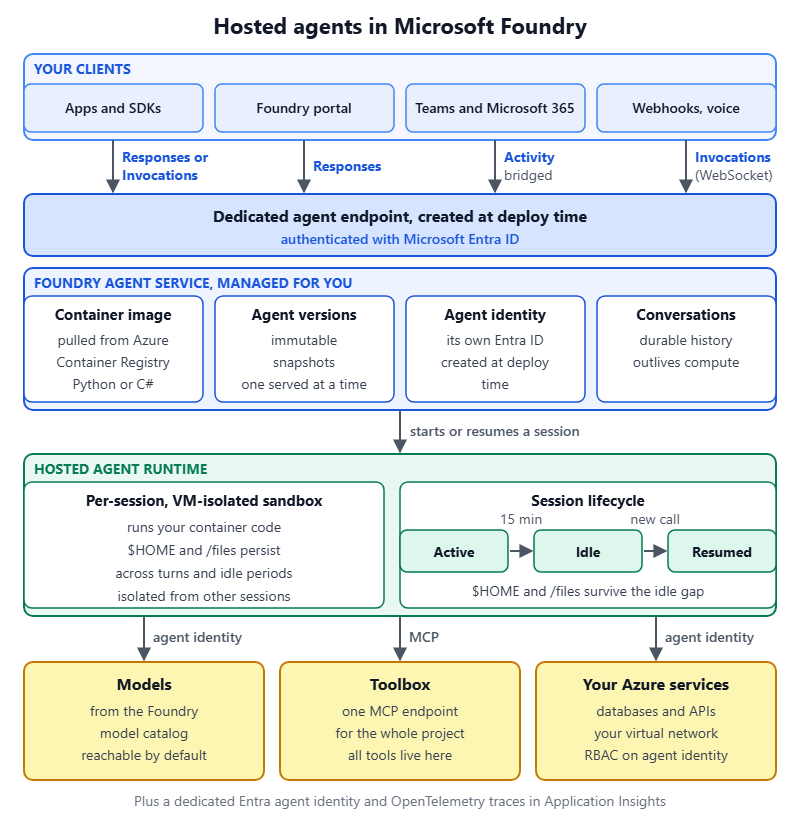
Image credit : Microsoft
In this article, instead of using static screenshots I created separate GIF images for each step to provide a step-by-step visual walkthrough.
Project references :
using Azure.AI.Projects;
using Azure.Core;
using Microsoft.Agents.AI;
using Microsoft.Agents.AI.Foundry.Hosting;
using Microsoft.AspNetCore.Builder;
using Microsoft.Extensions.AI;
using Microsoft.Extensions.Configuration;
using Microsoft.Extensions.DependencyInjection;
using Microsoft.Identity.Abstractions;
using Microsoft.Identity.Web;
using Microsoft.Identity.Web.TokenCacheProviders.InMemory;
using System.Text.Json.Serialization;
Code:
internal class Program
{

    static string[] scopes = new string[] { "https://ai.azure.com/.default" };
    static List<String> listoutput = new();
    static MicrosoftIdentityTokenCredential TokenCredentials;

    public async static Task Main(string[] args)
    {

        var configuration = new ConfigurationBuilder()
        .SetBasePath(AppContext.BaseDirectory)
        .AddJsonFile("appsettings.json", optional: false)
        .Build();

        ServiceCollection services = new ServiceCollection();

        services.AddSingleton<IConfiguration>(configuration);
        services.AddTokenAcquisition();
        services.AddInMemoryTokenCaches();
        services.AddMicrosoftIdentityAzureTokenCredential();
        services.AddHttpClient();
        services.AddAgentIdentities();
        services.Configure<MicrosoftIdentityApplicationOptions>(configuration.GetSection("AzureAd"));

       services.AddSingleton<AIFunction>(sp =>
          {

              return AIFunctionFactory.Create(ReturnCityTemperature, new AIFunctionFactoryOptions { Name = "ReturnCityTemperature", Description = "Gets the current weather for a specific city", SerializerOptions = CityTemperatureSerializerContext.Default.Options });
          }

      );
        services.AddSingleton<AIFunction>(sp =>
          {

              return AIFunctionFactory.Create(ReturnCountryCapital, new AIFunctionFactoryOptions { Name = "ReturnCountryCapital", Description = "Gets the capital city for a specific country.", SerializerOptions = CountryCapitalSerializerContext.Default.Options });
          }

      );

        ServiceProvider serviceProvider = services.BuildServiceProvider();

        WebApplicationBuilder builder = WebApplication.CreateBuilder(args);

        builder.Services.ConfigureHttpJsonOptions(options => options.SerializerOptions.TypeInfoResolverChain.Add(CountryCapitalSerializerContext.Default));
        builder.Services.ConfigureHttpJsonOptions(options => options.SerializerOptions.TypeInfoResolverChain.Add(CityTemperatureSerializerContext.Default));

        var tokenAcquirerFactory = serviceProvider.GetRequiredService<ITokenAcquirerFactory>();

        var authSchemeProvider = serviceProvider.GetRequiredService<Microsoft.Identity.Abstractions.IAuthenticationSchemeInformationProvider>();

        TokenCredentials = new MicrosoftIdentityTokenCredential(
           tokenAcquirerFactory,
           authSchemeProvider);
        TokenCredentials.Options.WithAgentIdentity(configuration["Foundry:AgentIdentityId"]);
        TokenCredentials.Options.RequestAppToken = true;

        var token = await TokenCredentials.GetTokenAsync(
            new TokenRequestContext(scopes),
            CancellationToken.None);

        Console.WriteLine(token.Token);

        AIProjectClient projectClient = new(new Uri({Foundry Project EndPoint}), TokenCredentials);

        var aifunctions = serviceProvider.GetServices<AIFunction>();
        List<AITool> tools = new(aifunctions);
        AIAgent agent = projectClient
          .AsAIAgent(
              model: "gpt-4.1",
              name: "weather and capital city assistant",
               instructions: "You are a friendly assistant. Keep your answers brief and don't use external data or any data that you are trained on. Only use the data provided to you from functions ReturnCityTemperature and ReturnCountryCapital.",
              description: "A simple general-purpose weather and capital city AI assistant",
              tools: tools);

        builder.AddFoundryResponses(agent);
        var app = builder.Build();
        app.MapFoundryResponses();
        app.Run();

    }
    public static Func<CityTemperatureSearchRequest, CityTemperatureSearchResponse> ReturnCityTemperature = (CityTemperatureSearchRequest) =>
    {
        Console.WriteLine("ReturnCityTemperature invoked");
        switch (CityTemperatureSearchRequest.City)
        {

            case "Mumbai":

                return new CityTemperatureSearchResponse
                {

                    City = "Mumbai",
                    Temperature = "40"
                };

                break;

            case "Pune":

                return new CityTemperatureSearchResponse
                {

                    City = "Pune",
                    Temperature = "41"
                };

                break;

            case "Delhi":

                return new CityTemperatureSearchResponse
                {

                    City = "Delhi",
                    Temperature = "42"
                };

                break;

            case "Chennai":

                return new CityTemperatureSearchResponse
                {

                    City = "Chennai",
                    Temperature = "43"
                };
                break;

        }

        return new CityTemperatureSearchResponse
        {

            City = CityTemperatureSearchRequest.City,
            Temperature = "Unknown"
        };


    };

    public static Func<CountryCapitalSearchRequest, CountryCapitalSearchResponse> ReturnCountryCapital = (CountryCapitalSearchRequest) =>

   {
       Console.WriteLine("ReturnCountryCapital invoked");

       switch (CountryCapitalSearchRequest.Country)
       {

           case "India":

               return new CountryCapitalSearchResponse
               {

                   Country = "India",
                   Capital = "New Delhi"
               };
               break;

           case "USA":

               return new CountryCapitalSearchResponse
               {

                   Country = "USA",
                   Capital = "Washington"
               };
               break;


           case "Germany":

               return new CountryCapitalSearchResponse
               {

                   Country = "Germany",
                   Capital = "Berlin"
               };
               break;

           case "Russia":

               return new CountryCapitalSearchResponse
               {

                   Country = "Russia",
                   Capital = "Moscow"
               };
               break;
       }

       return new CountryCapitalSearchResponse
       {

           Country = CountryCapitalSearchRequest.Country,
           Capital = "Unknown"
       };


   };
}

public class CityTemperatureSearchRequest
{
    public string City { get; set; }
}

public class CityTemperatureSearchResponse
{
    public string City { get; set; }
    public string Temperature { get; set; }
}

public class CountryCapitalSearchRequest
{
    public string Country { get; set; }
}

public class CountryCapitalSearchResponse
{

    public string Country { get; set; }
    public string Capital { get; set; }

}

[JsonSerializable(typeof(CountryCapitalSearchRequest))]
[JsonSerializable(typeof(CountryCapitalSearchResponse))]
internal sealed partial class CountryCapitalSerializerContext : JsonSerializerContext;


[JsonSerializable(typeof(CityTemperatureSearchRequest))]
[JsonSerializable(typeof(CityTemperatureSearchResponse))]
internal sealed partial class CityTemperatureSerializerContext : JsonSerializerContext;
Our agent will invoke two functions:
- ReturnCityTemperature
- ReturnCountryCapital
The agent is strictly instructed to return only the data provided by these two functions and should not provide any external data as the output on which the model is trained on.
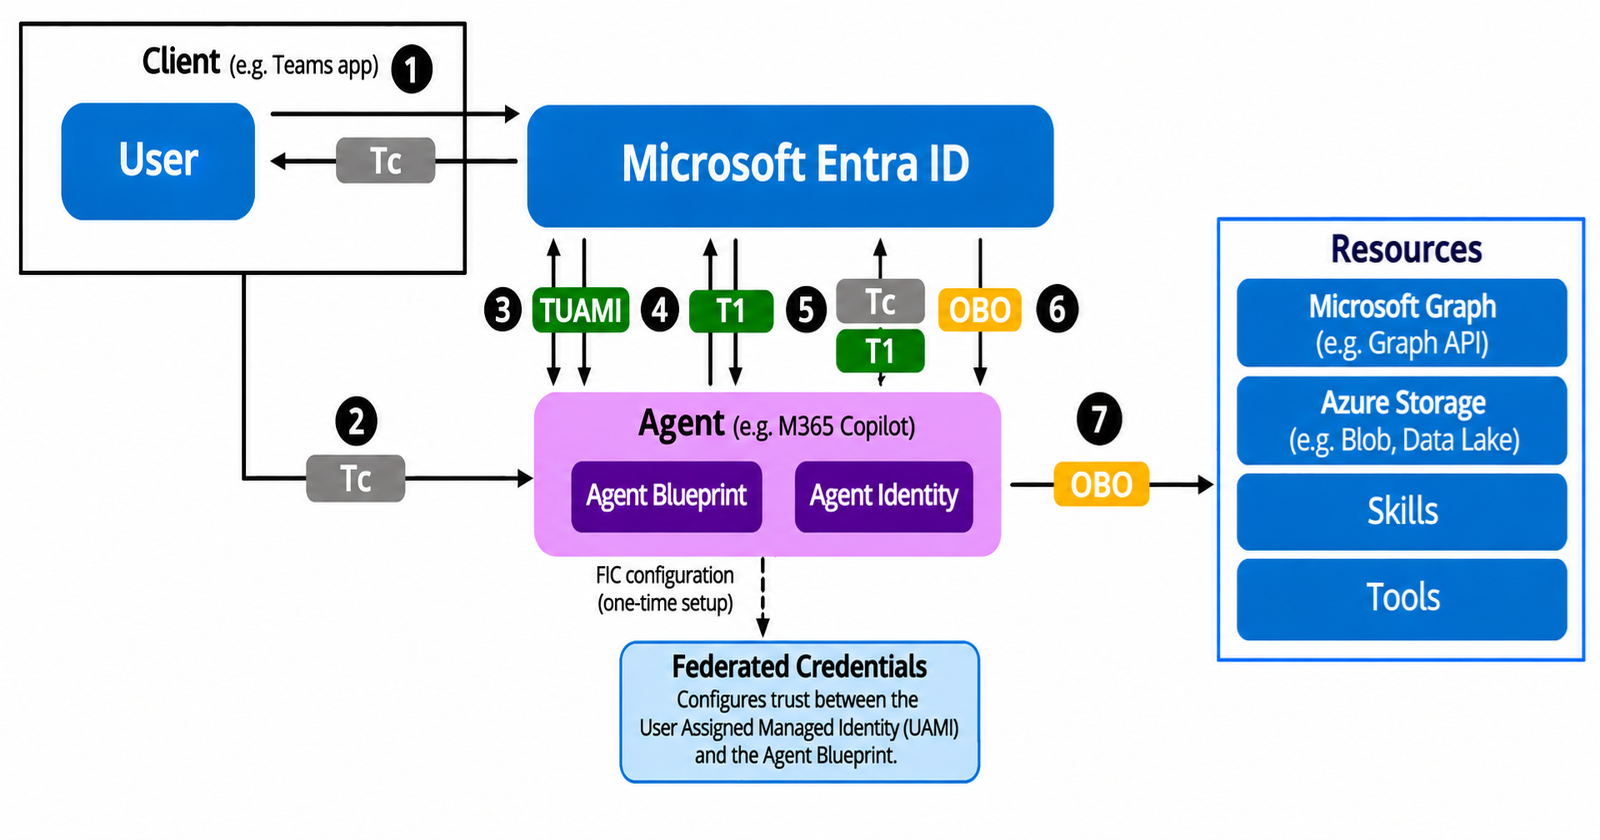
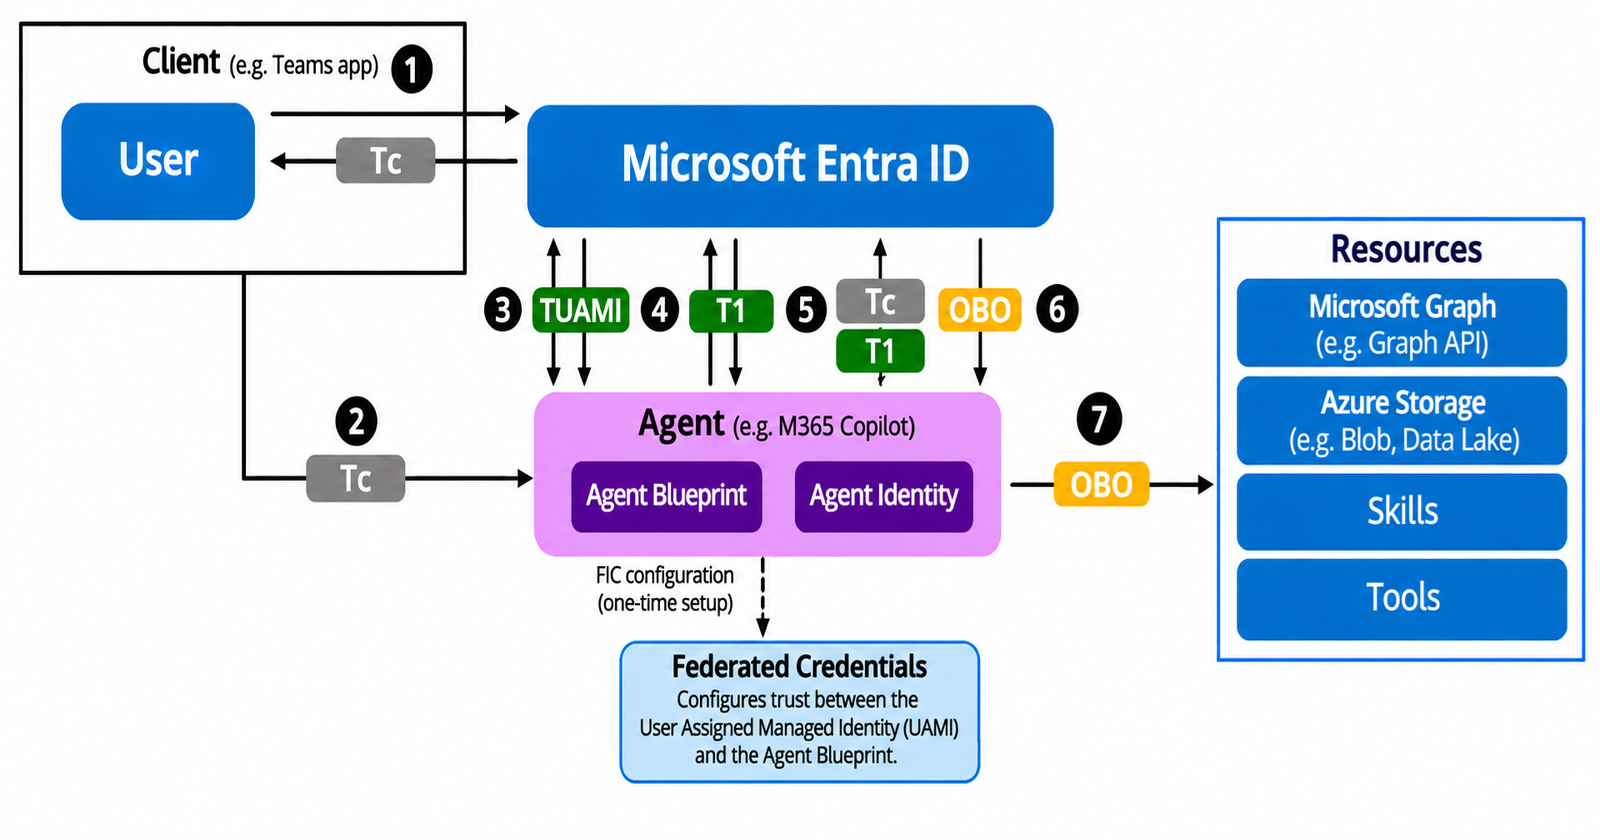
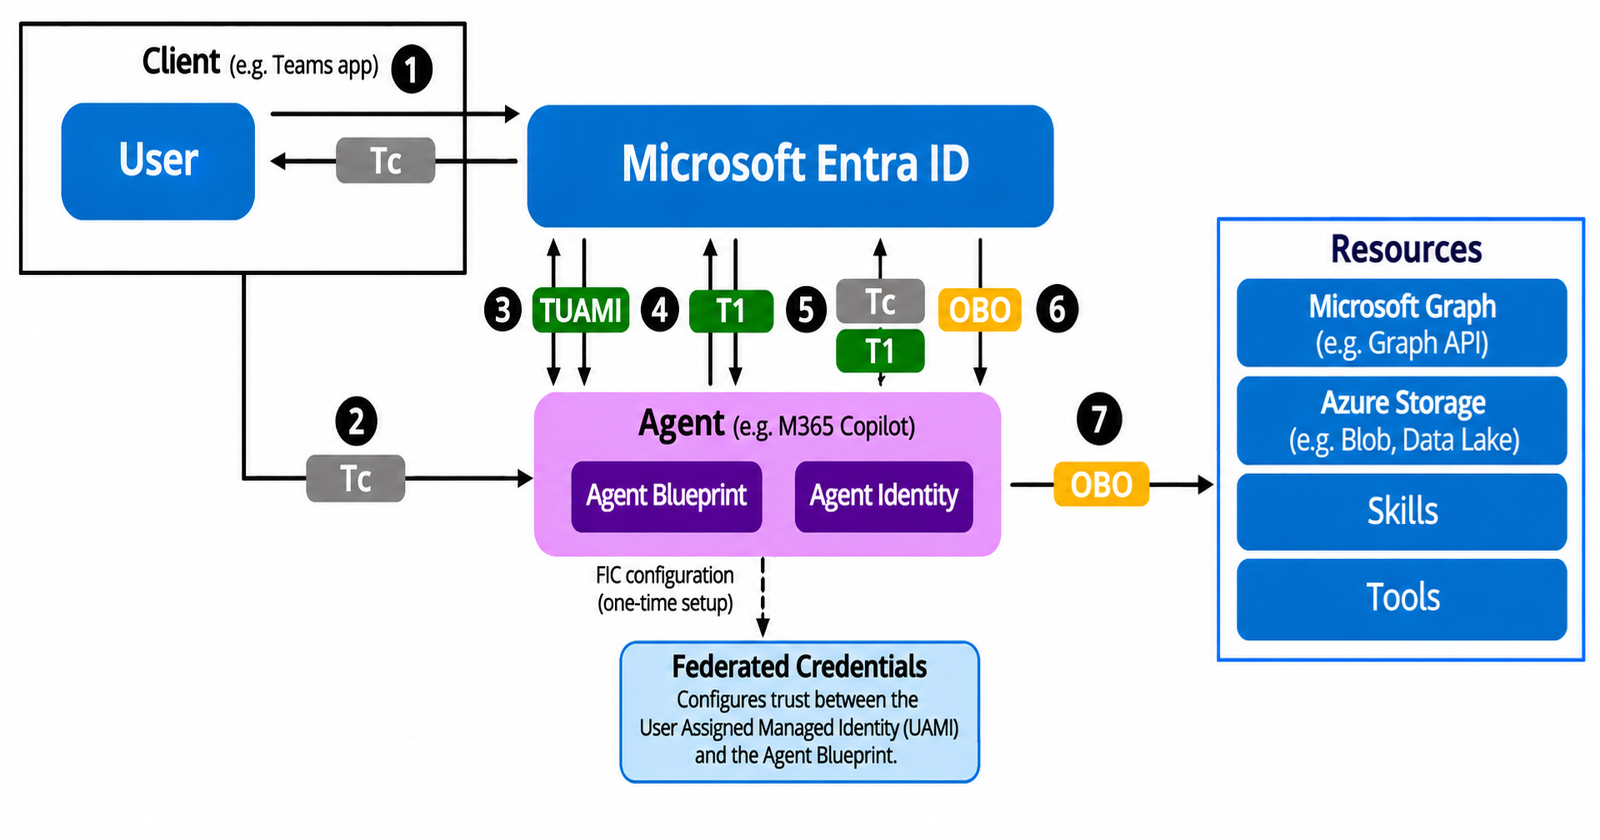
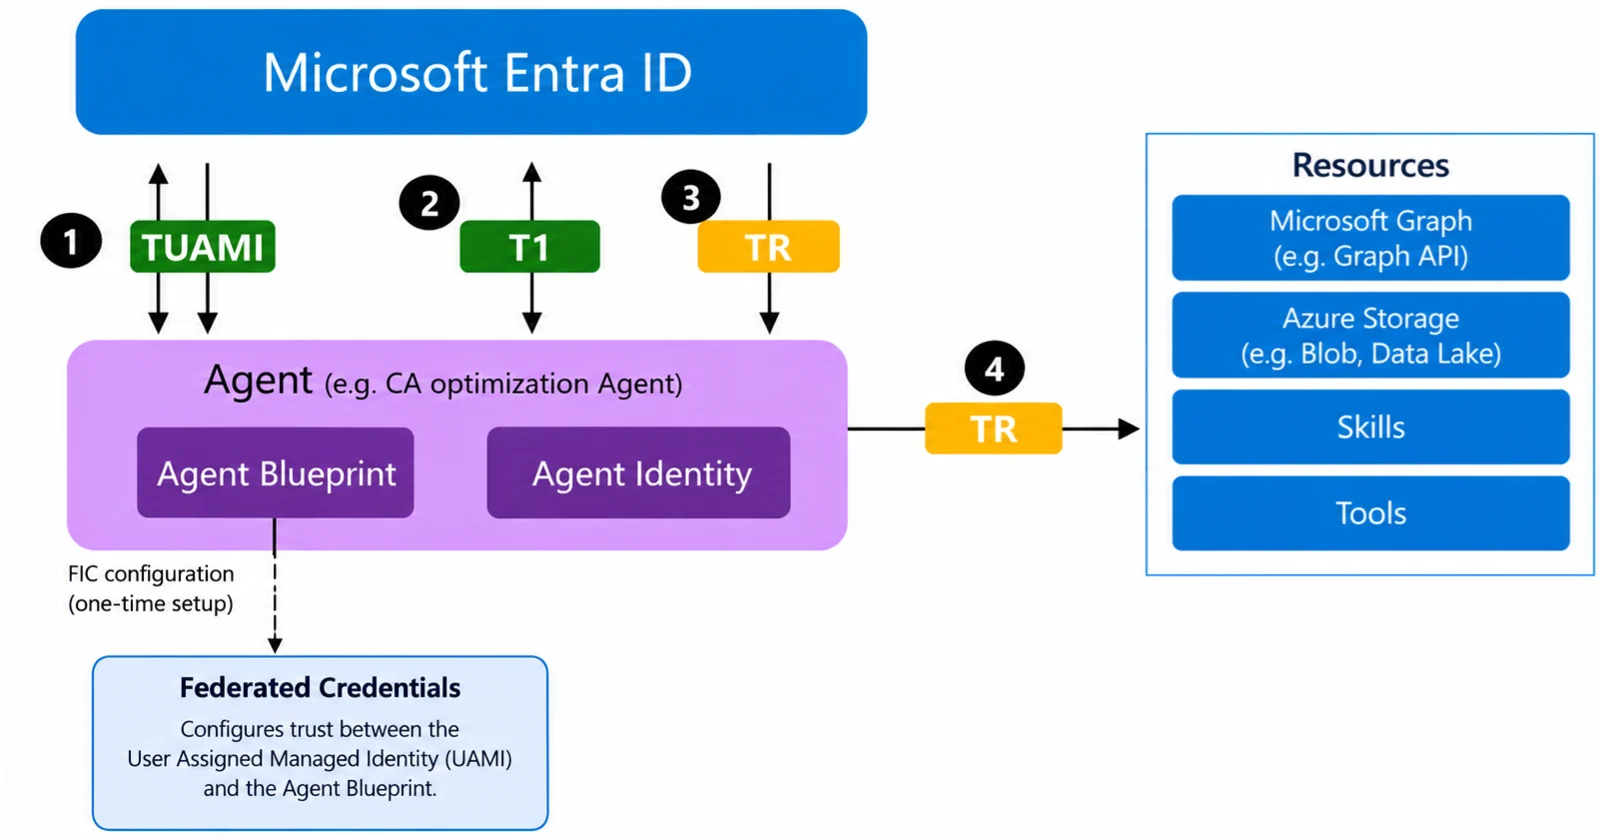
I used agent identities to generate access token for AIProjectClient.
For additional details on the Agent Identity approach used in this article, refer to my previous article on the topic here.
I have used DI for agent identities and the tool definitions
Also I used HTTP JSON serialization JsonSerializerContext for serialization/ deserialization. By this approach, the application can use source-generated JSON metadata instead of relying entirely on reflection at runtime.
[JsonSerializable(typeof(CountryCapitalSearchRequest))]
[JsonSerializable(typeof(CountryCapitalSearchResponse))]
internal sealed partial class CountryCapitalSerializerContext : JsonSerializerContext;

[JsonSerializable(typeof(CityTemperatureSearchRequest))]
[JsonSerializable(typeof(CityTemperatureSearchResponse))]
internal sealed partial class CityTemperatureSerializerContext : JsonSerializerContext;
I had used this same approach in my article on AGUI for MAF.
Have a look at this.
Instead of using
builder.Services.AddFoundryResponses(agent)
I used
builder.AddFoundryResponses(agent)
This is because we can't use service collection registration for hosted agent in Foundry as ServiceCollection bypasses configuration binding. Instead we have to use host builder registration
So, please be aware of the above aspect in your code.
appsettings.json>>
{
    "AzureAd": {
        "Instance": "https://login.microsoftonline.com/",
        "TenantId": "Tenant Id",
        "ClientId": "Blue Print Id",
        "ClientCredentials": [
            {
                "SourceType": "ClientSecret",
                "ClientSecret": "Blue Print Client Secret"
            }
        ]
    },

    "Foundry": {
        "Project": "Foundry Project EndPoint",
        "AgentIdentityId": "Agent Identity Id"
    }
}
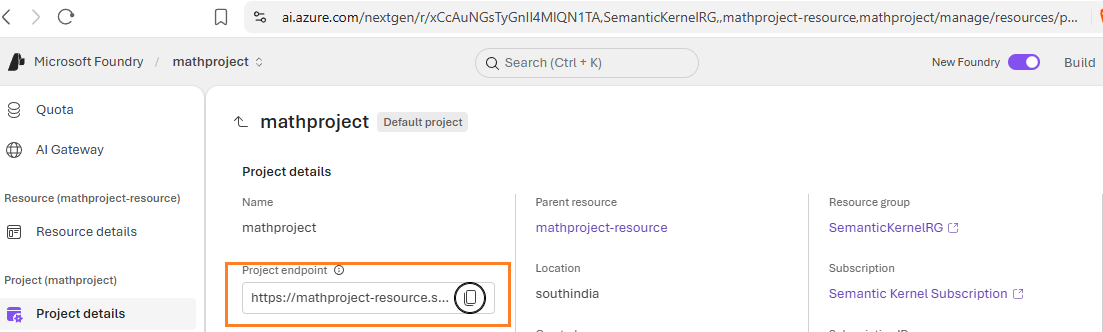
The Foundry project end point can be found here
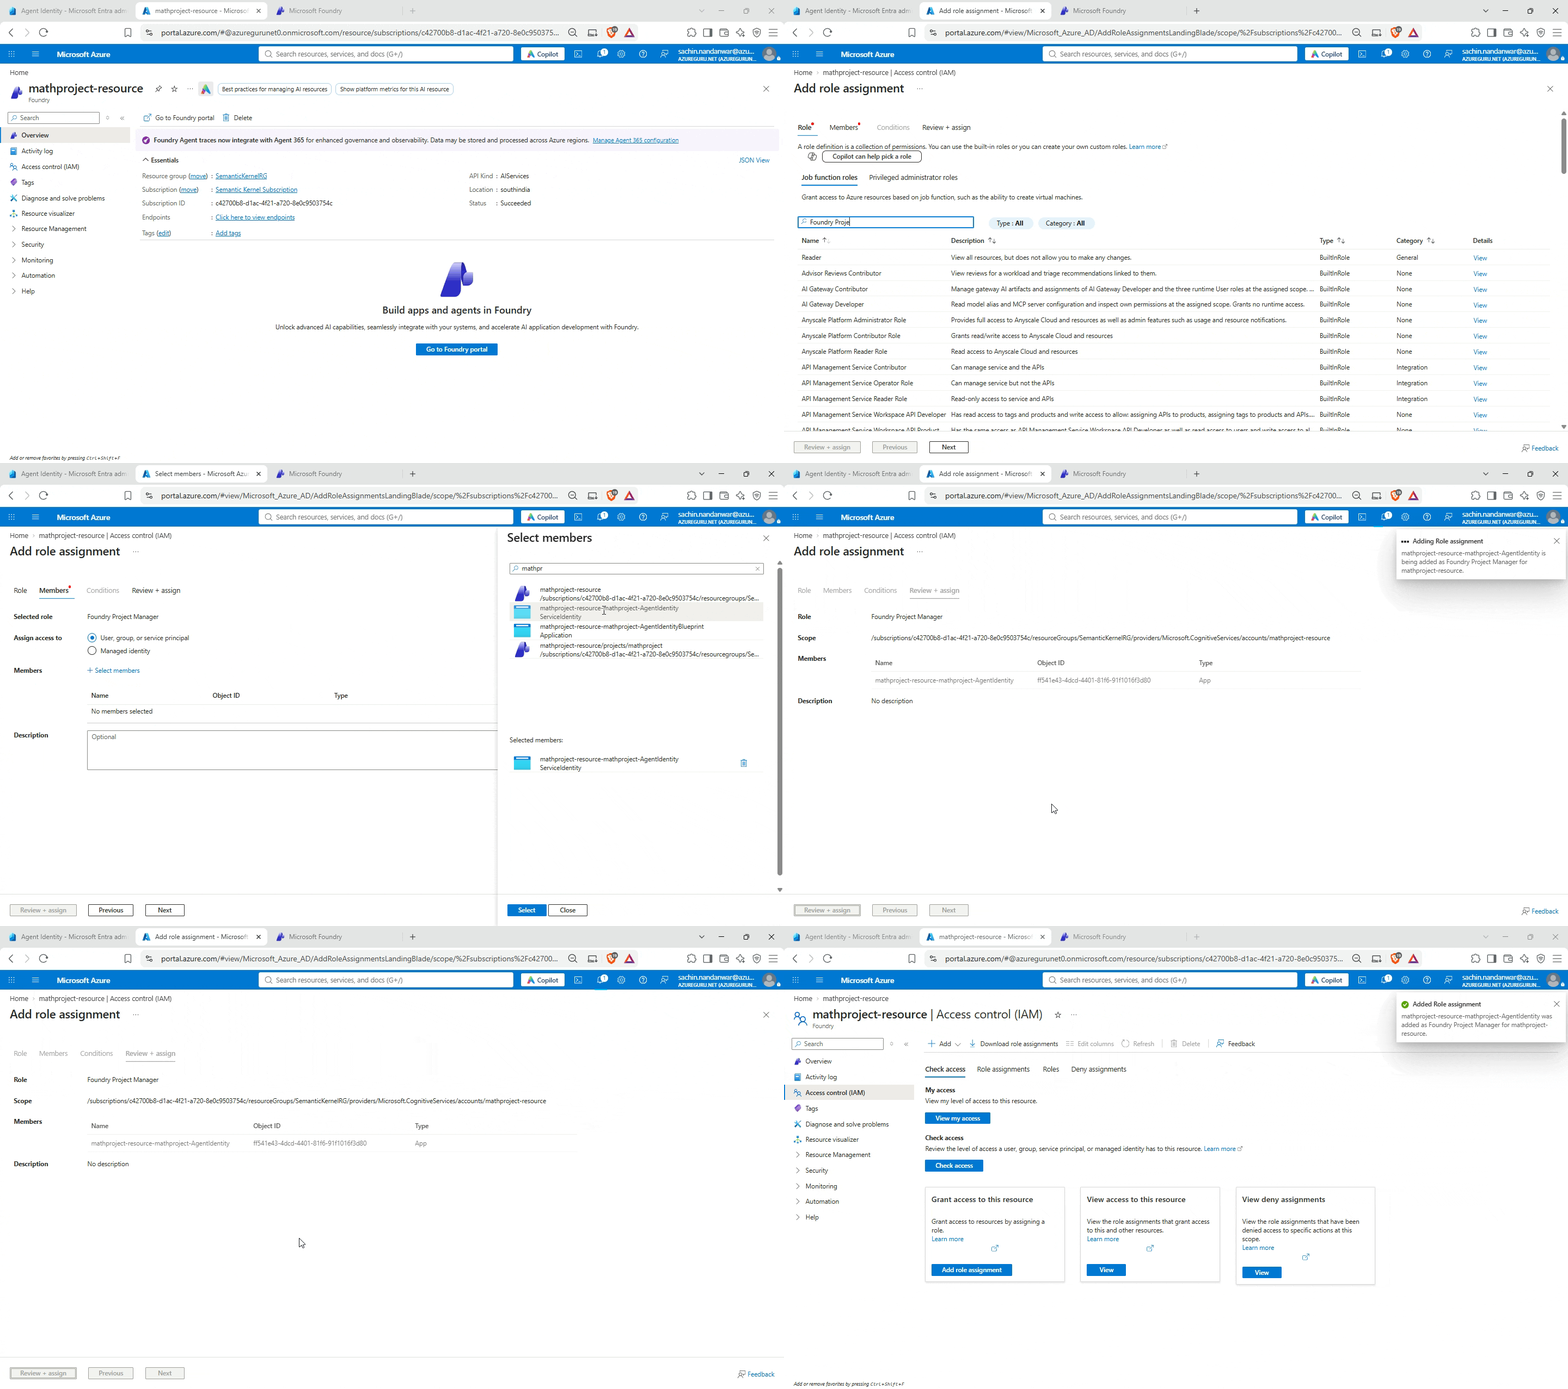
To get started, the very first step is to grant the Agent Identity's service principal at least the Foundry Project Manager role on the Foundry project.
Install Microsoft.Azd and run azd auth login
Once the role assignment is done, start a PowerShell session in admin mode and install Azure Azd CLI using the following commands
winget install Microsoft.Azd
Once azd is installed, login into azure tenant through the CLI
azd auth login
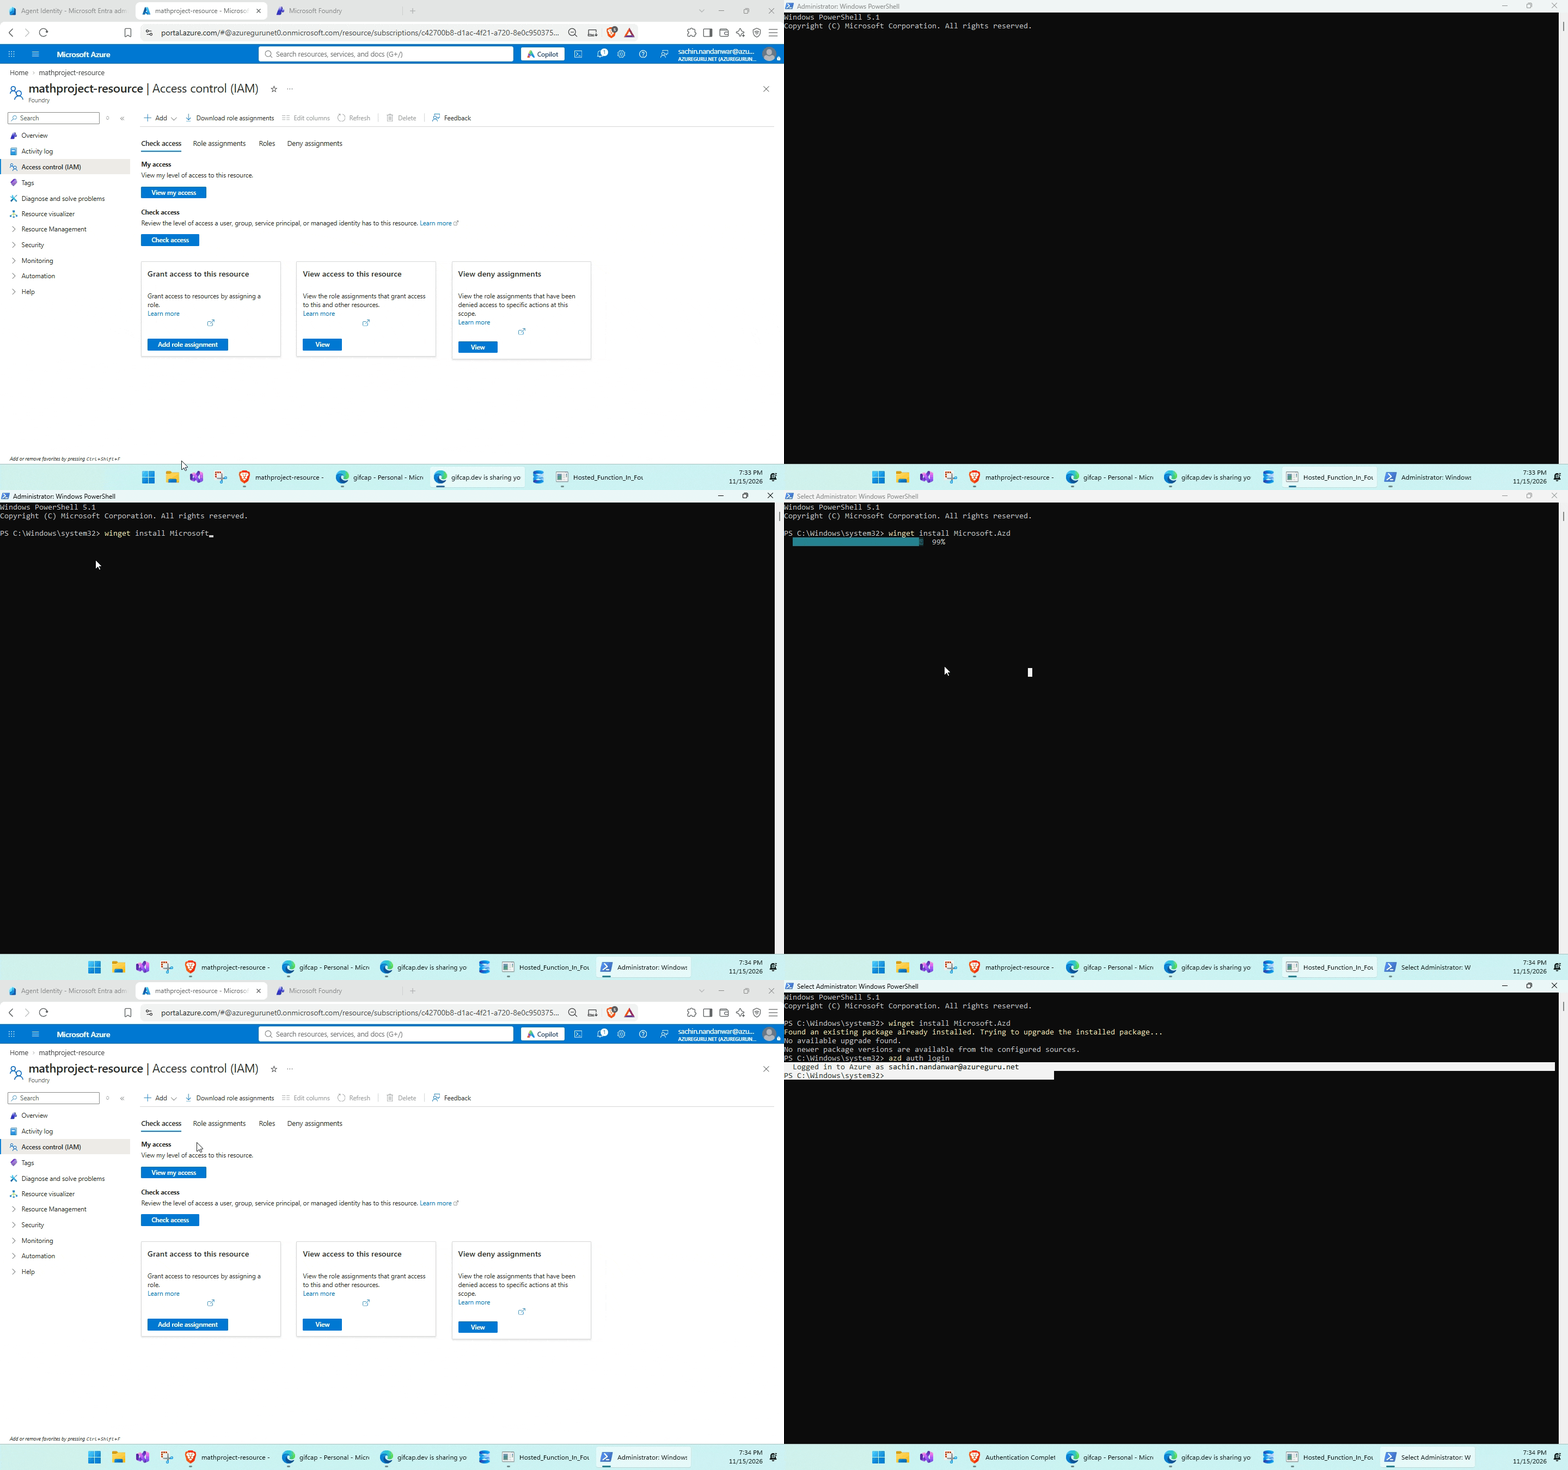
As my system already had the CLI installed, the command returns "Found existing package already installed" message.
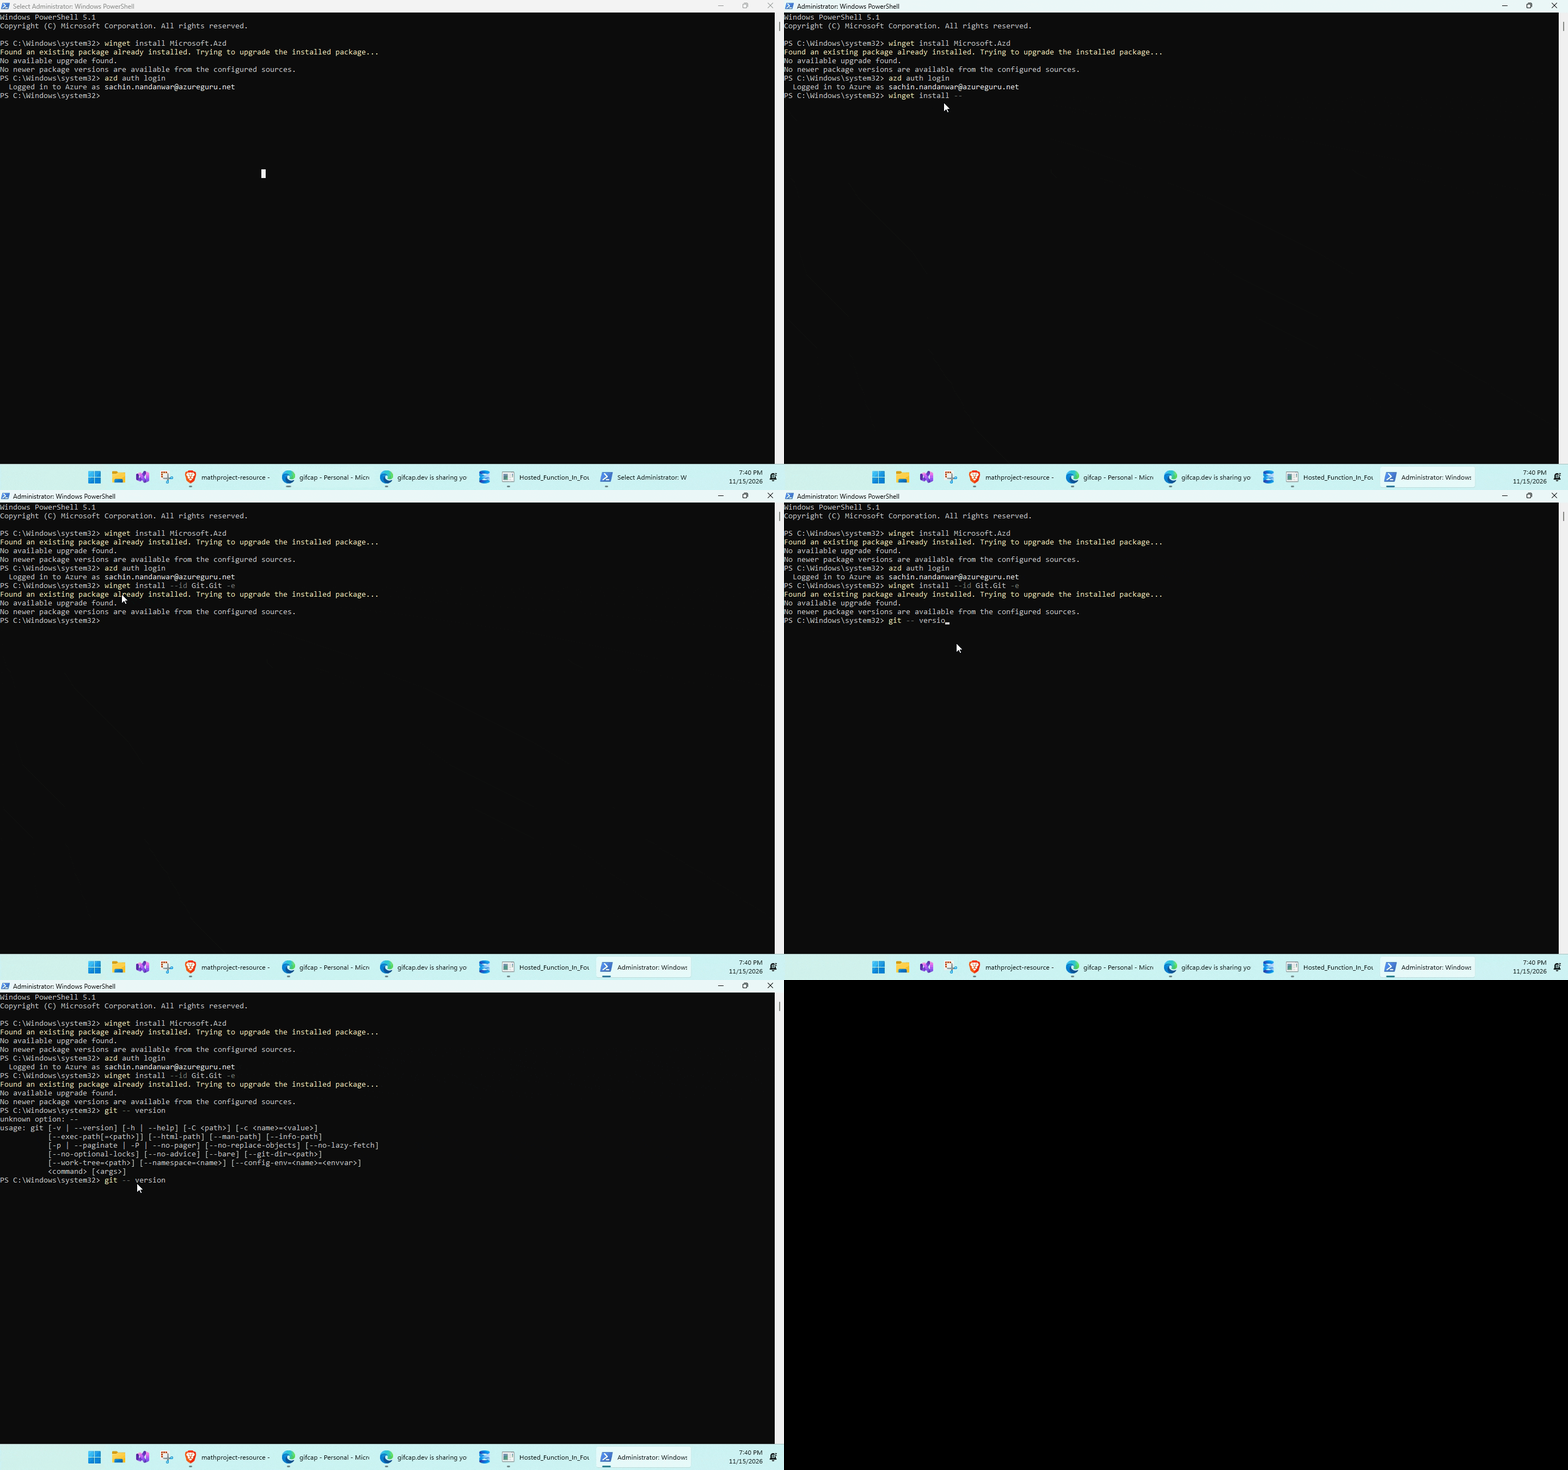
Git CLI
In the next step, install Git CLI in your system through the following command and also verify its version
winget install --id Git.Git -e
git --version
YAML File
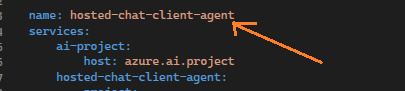
Copy the YAML template file into your C# project from this location and configure the requisite values.
name: hosted-chat-client-agent
services:
    ai-project:
        host: azure.ai.project
    hosted-chat-client-agent:
        project: .
        host: azure.ai.agent
        language: csharp
        uses:
            - ai-project
        codeConfiguration:
            dependencyResolution: remote_build
            entryPoint: {Your Chsarp Project name.dll}
            runtime: dotnet_10
        env:
            ASPNETCORE_URLS: http://+:8088
            AZURE_AI_MODEL_DEPLOYMENT_NAME: {Foundry Deployment name}
            AZURE_AI_PROJECT_ID: {Foundry Project Id}
        container:
            resources:
                cpu: "0.5"
                memory: 1Gi
        description: |
            A simple general-purpose AI assistant hosted as a Foundry Hosted Agent using the Agent Framework instance hosting pattern.
        kind: hosted
        metadata:
            tags:
                - AI Agent Hosting
                - Azure AI AgentServer
                - Responses Protocol
                - Streaming
                - Agent Framework
        name: Weather-Capital-Agent
        protocols:
            - protocol: responses
              version: 2.0.0
        infra:
              provider: microsoft.foundry
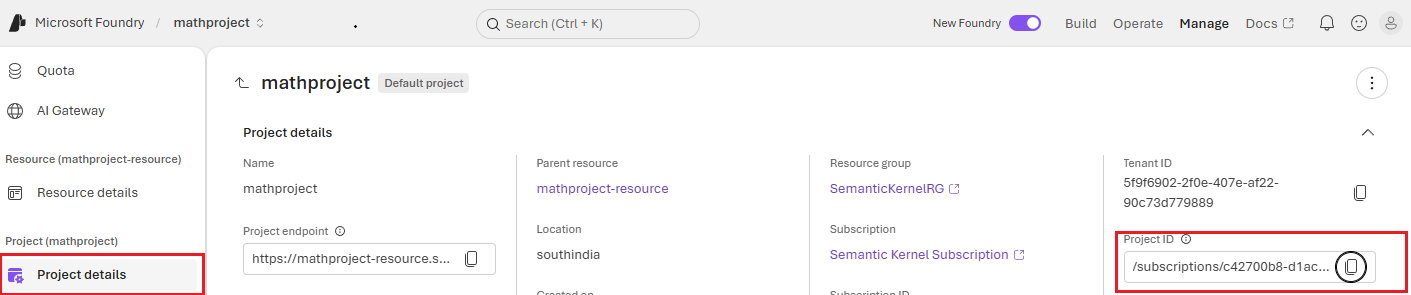
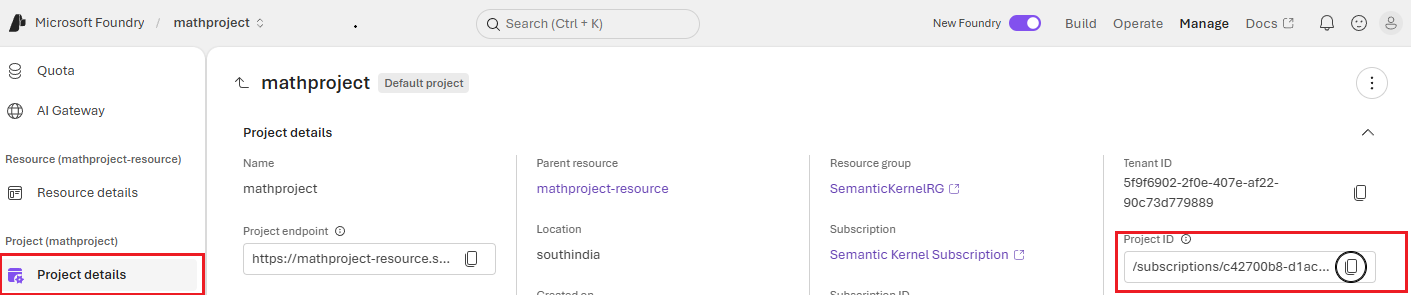
You can find the Foundry project ID value for AZURE_AI_PROJECT_IDYAML variable under Project details option in your Foundry project.
azd ai agent init
Next steps are very crucial.
Create a new directory in your preferred deployment location in your local system.
I created a directory with name weather-capital-agent
mkdir weather-capital-agent
cd weather-capital-agent
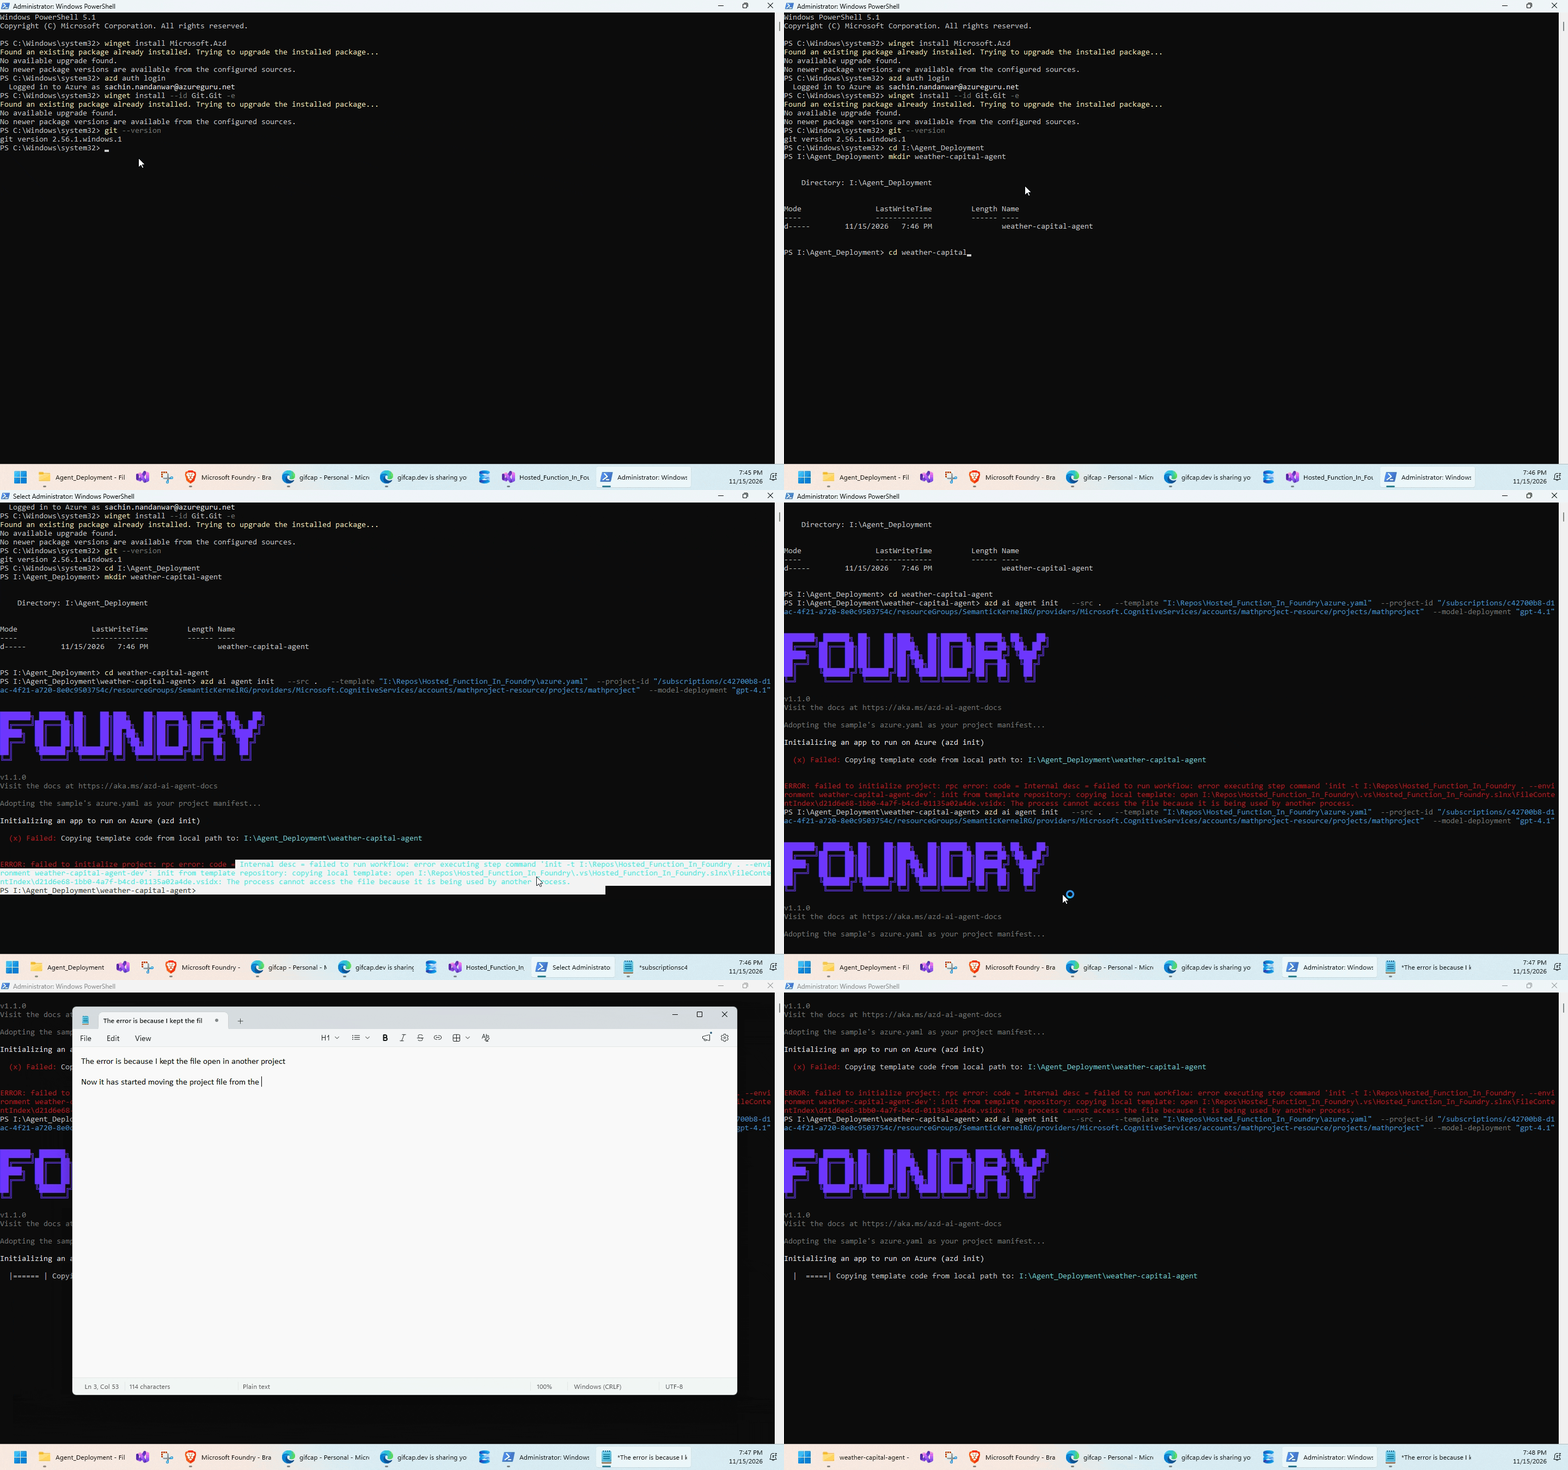
Run the following command
azd ai agent init --src . --template {Your Csharp Project location} --project-id {Your Foundry Project id} --model-deployment {Foundry Deployment Name}
So, azd ai agent init is used to scaffold a hosted agent project with your project files you need to build, test and deploy an AI agent to Microsoft Foundry. It initializes the Git repository and copies the code to the new directory that we created earlier and configures it with details from your selected Foundry project.
The CLI adopts the azure.yaml file as the project manifest and downloads the referenced agent source.
For template adoption, --src selects the destination of the entire project and with --model-deployment we choose the Foundry deployed model at init time.

azd ai agent run
Once the agent init execution completes, execute azd ai agent run to test the agent in your local browser

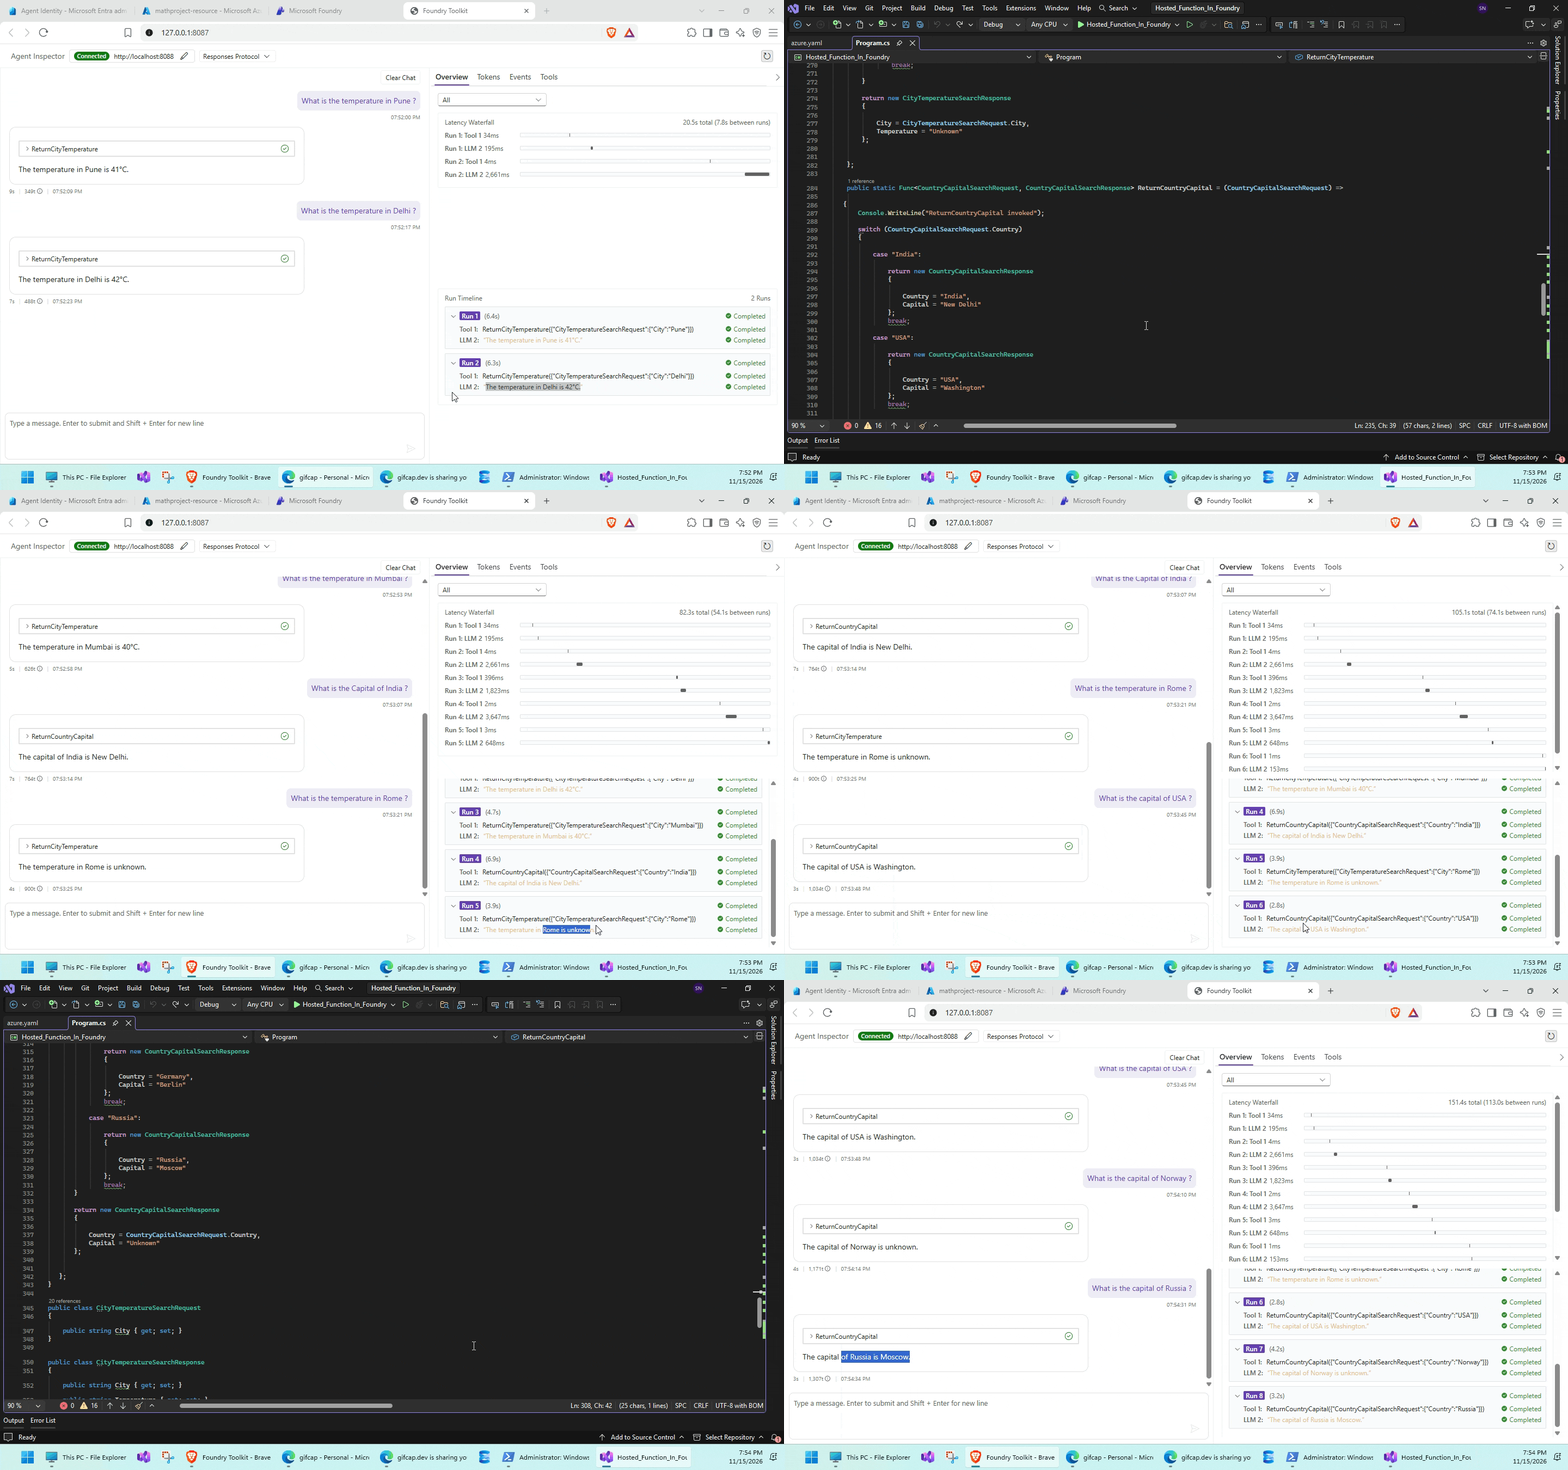
Now that we ensured that the tool invocation is working as expected, its time to deploy it to Foundry.
But there are a few azd env variables that needs to be pre configured prior to the deployment.
azd env set AZURE_AI_MODEL_DEPLOYMENT_NAME {Model Deployment Name}

azd env set FOUNDRY_PROJECT_ENDPOINT {Foundry Project Endpoint}

azd env set AZURE_AI_PROJECT_ID {Foundry Project Id}

azd env new {any name}
You can get the value for {Foundry Project Endpoint} from here
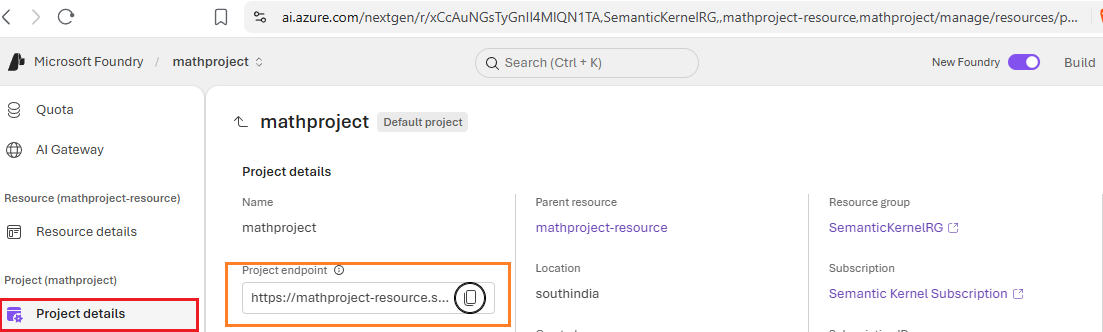
and the value for {Foundry Project Id} from here
azd ai agent init --infra
azd ai agent init --infra
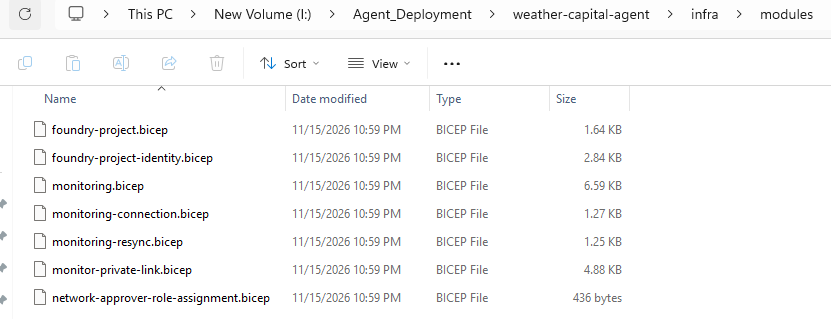
This command scaffolds biceps files for the Microsoft Foundry AI agent.

It creates an infra folder in the deployment folder location.
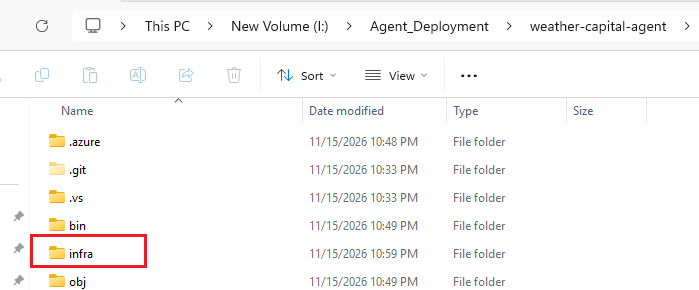
A bunch of biceps files are created inside the infra folder that has all the configuration details for deployment
azd provision and azd deploy
Once the infra files are generated execute the following commands
azd provision
azd deploy
azd provision >> It creates the underlying cloud infrastructure for the application by reading the biceps files generated by azd ai agent init --infra
azd deploy >> It deploys the agent to Foundry once all requisites infrastructure is ready and provisioned.
Both commands will take some time to complete.
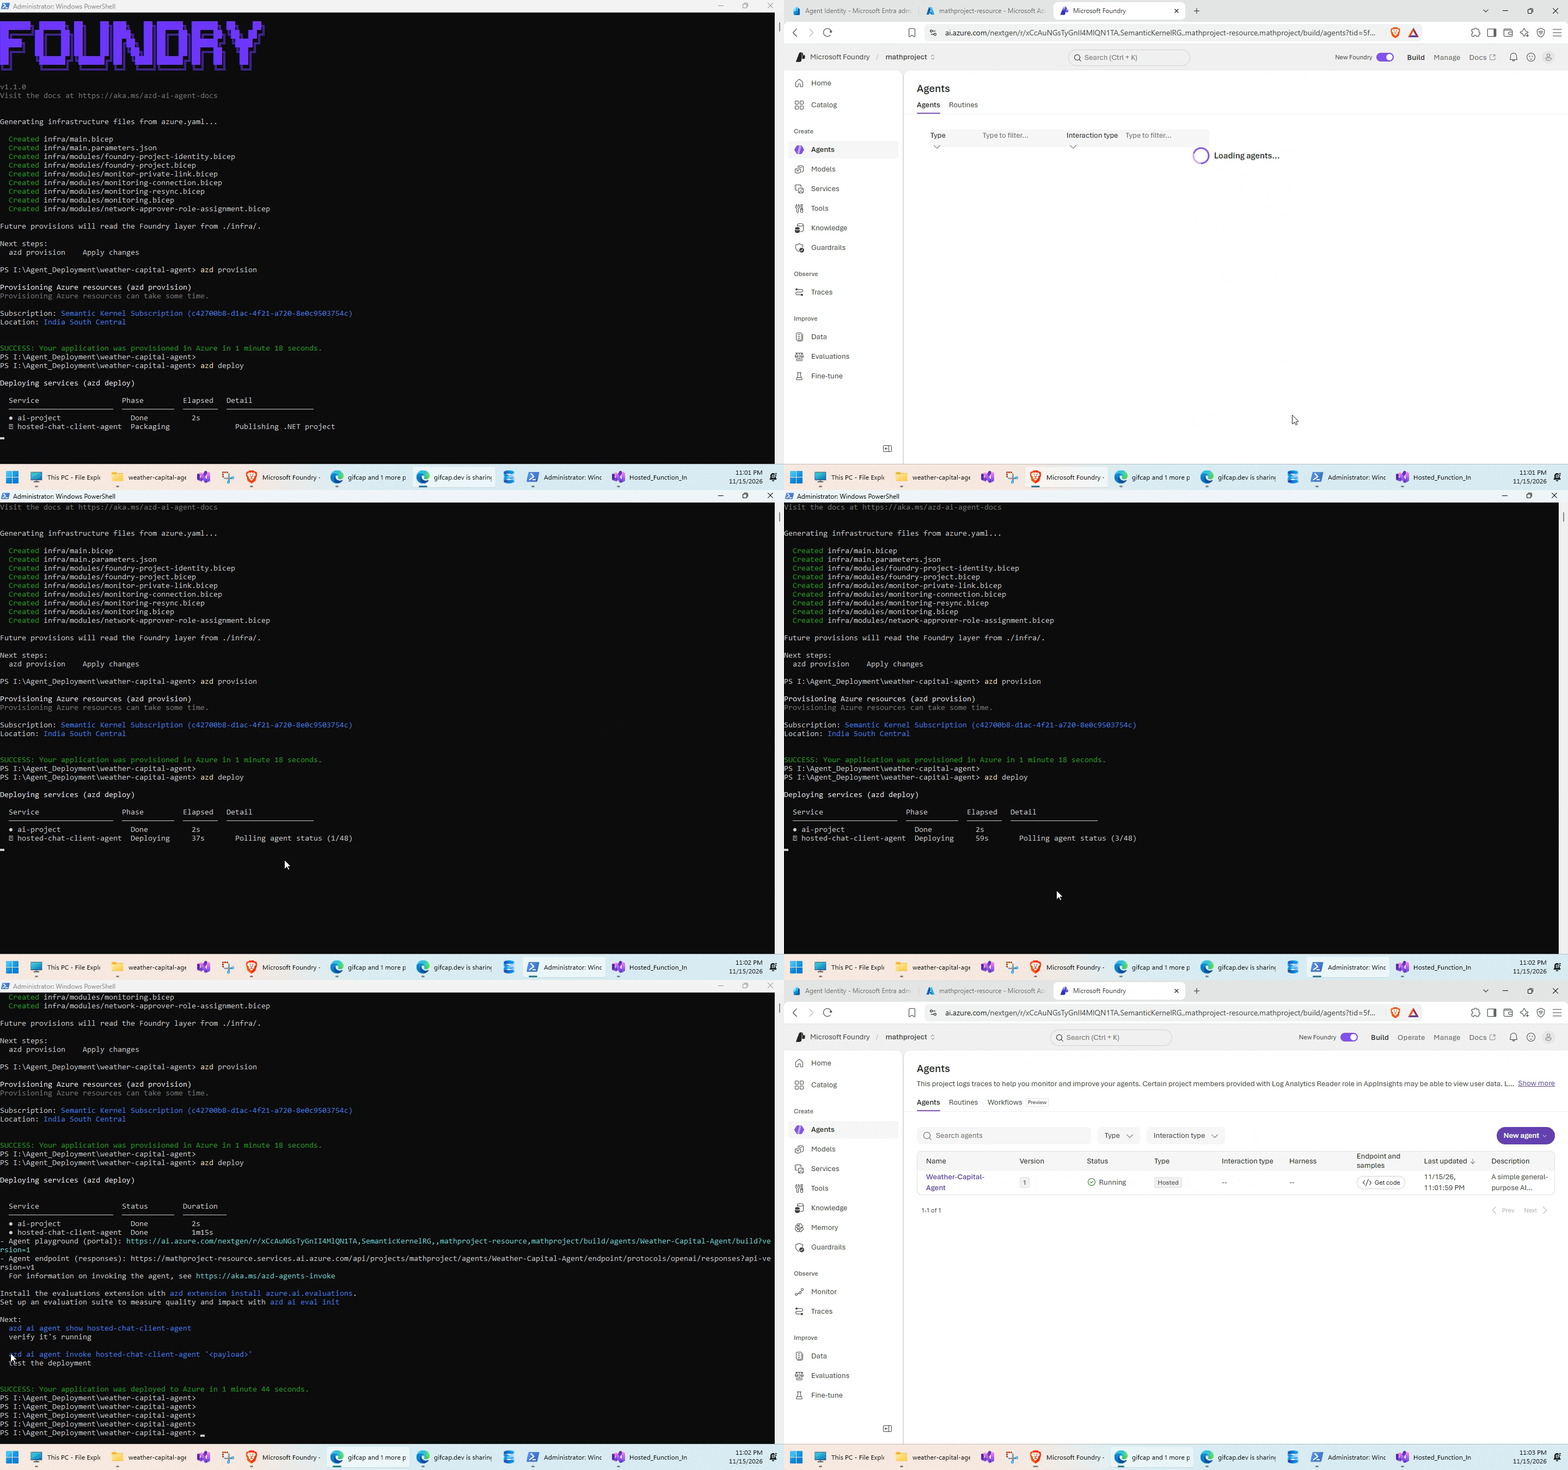
Post execution , refresh the Microsoft Foundry page and you will see the agent created on it.
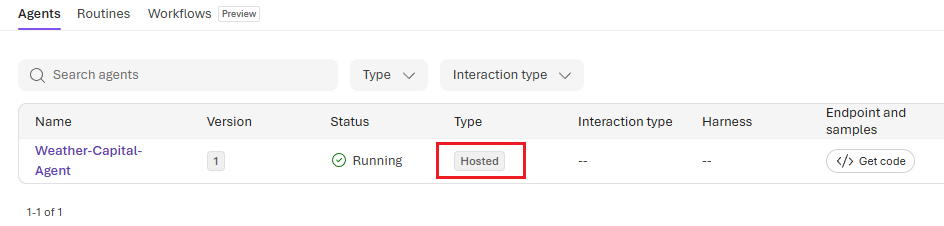
The agent type is Hosted.
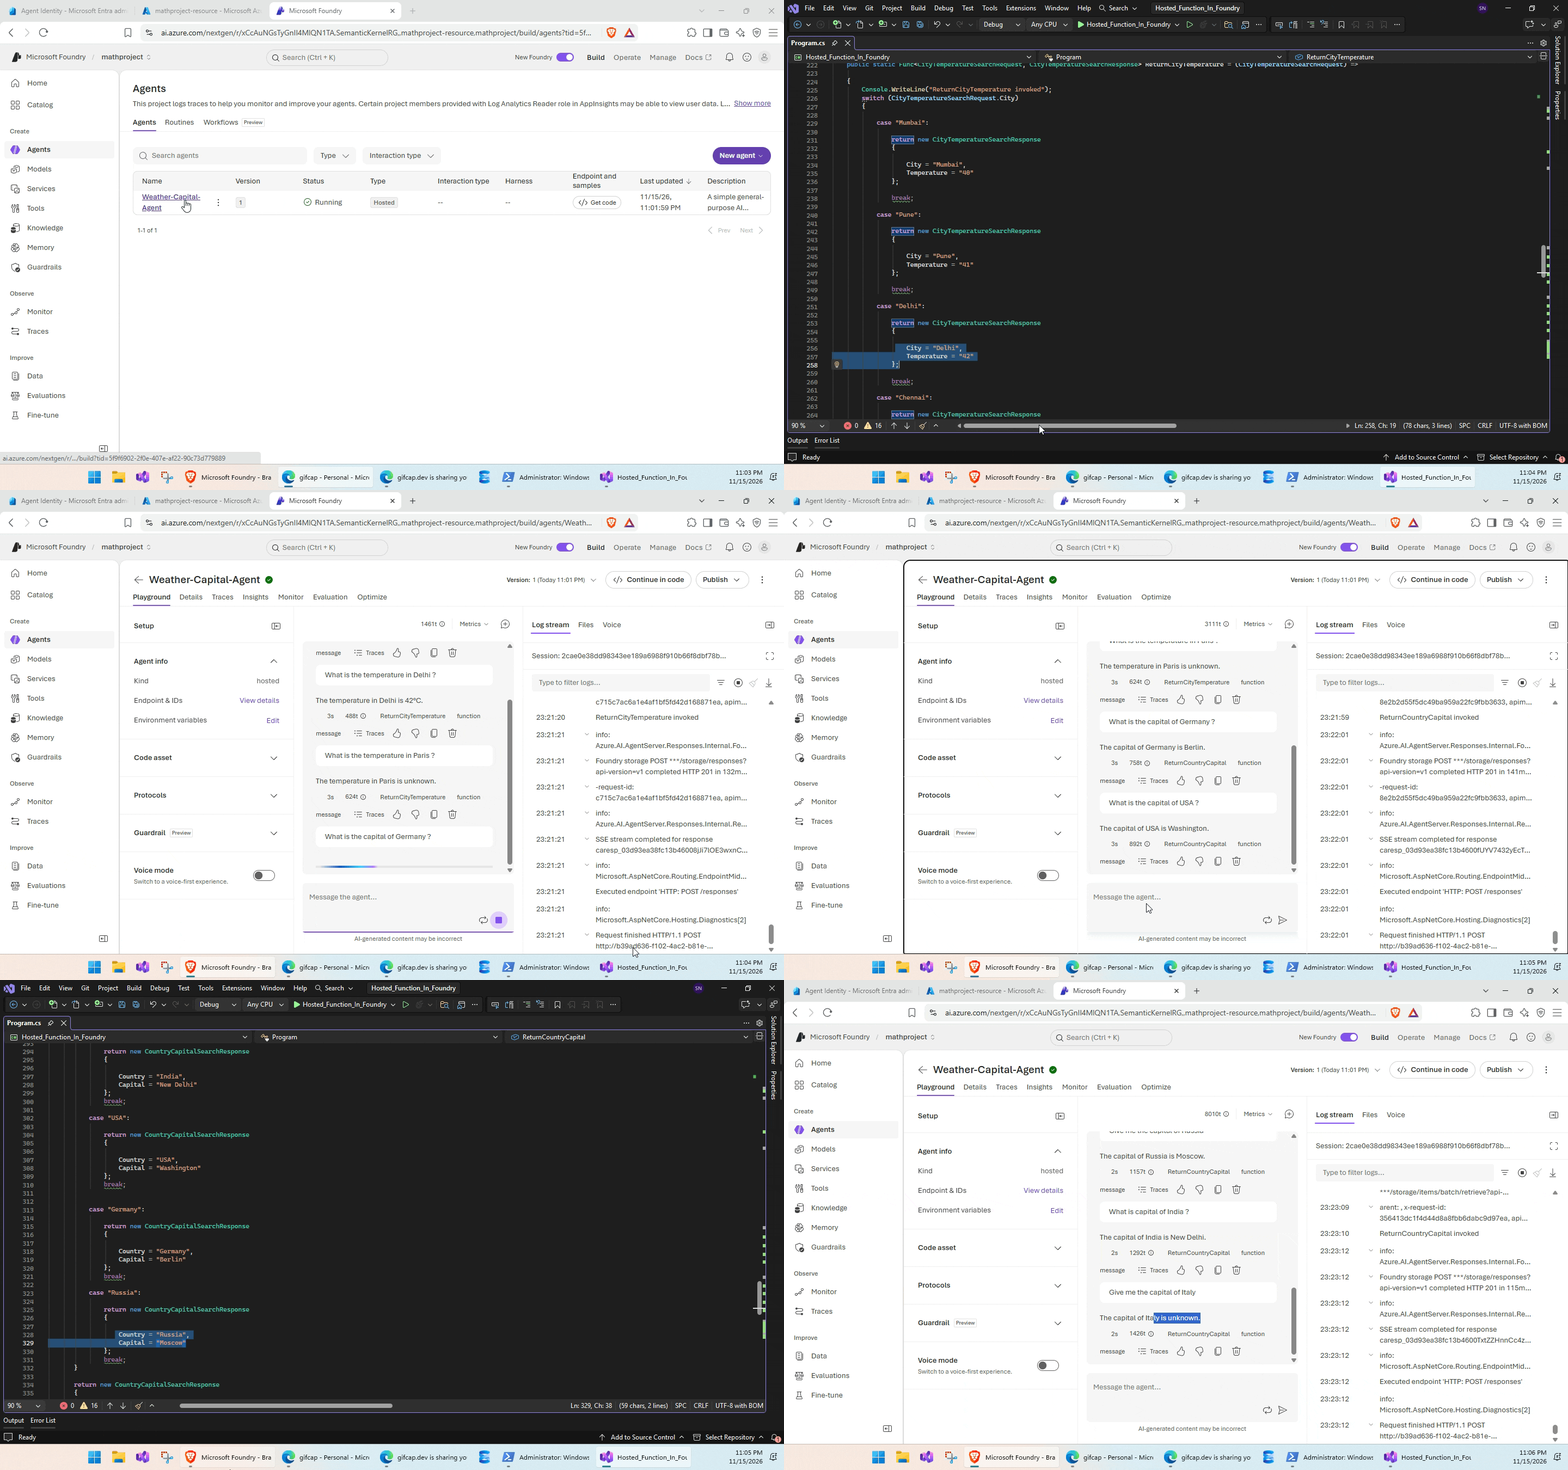
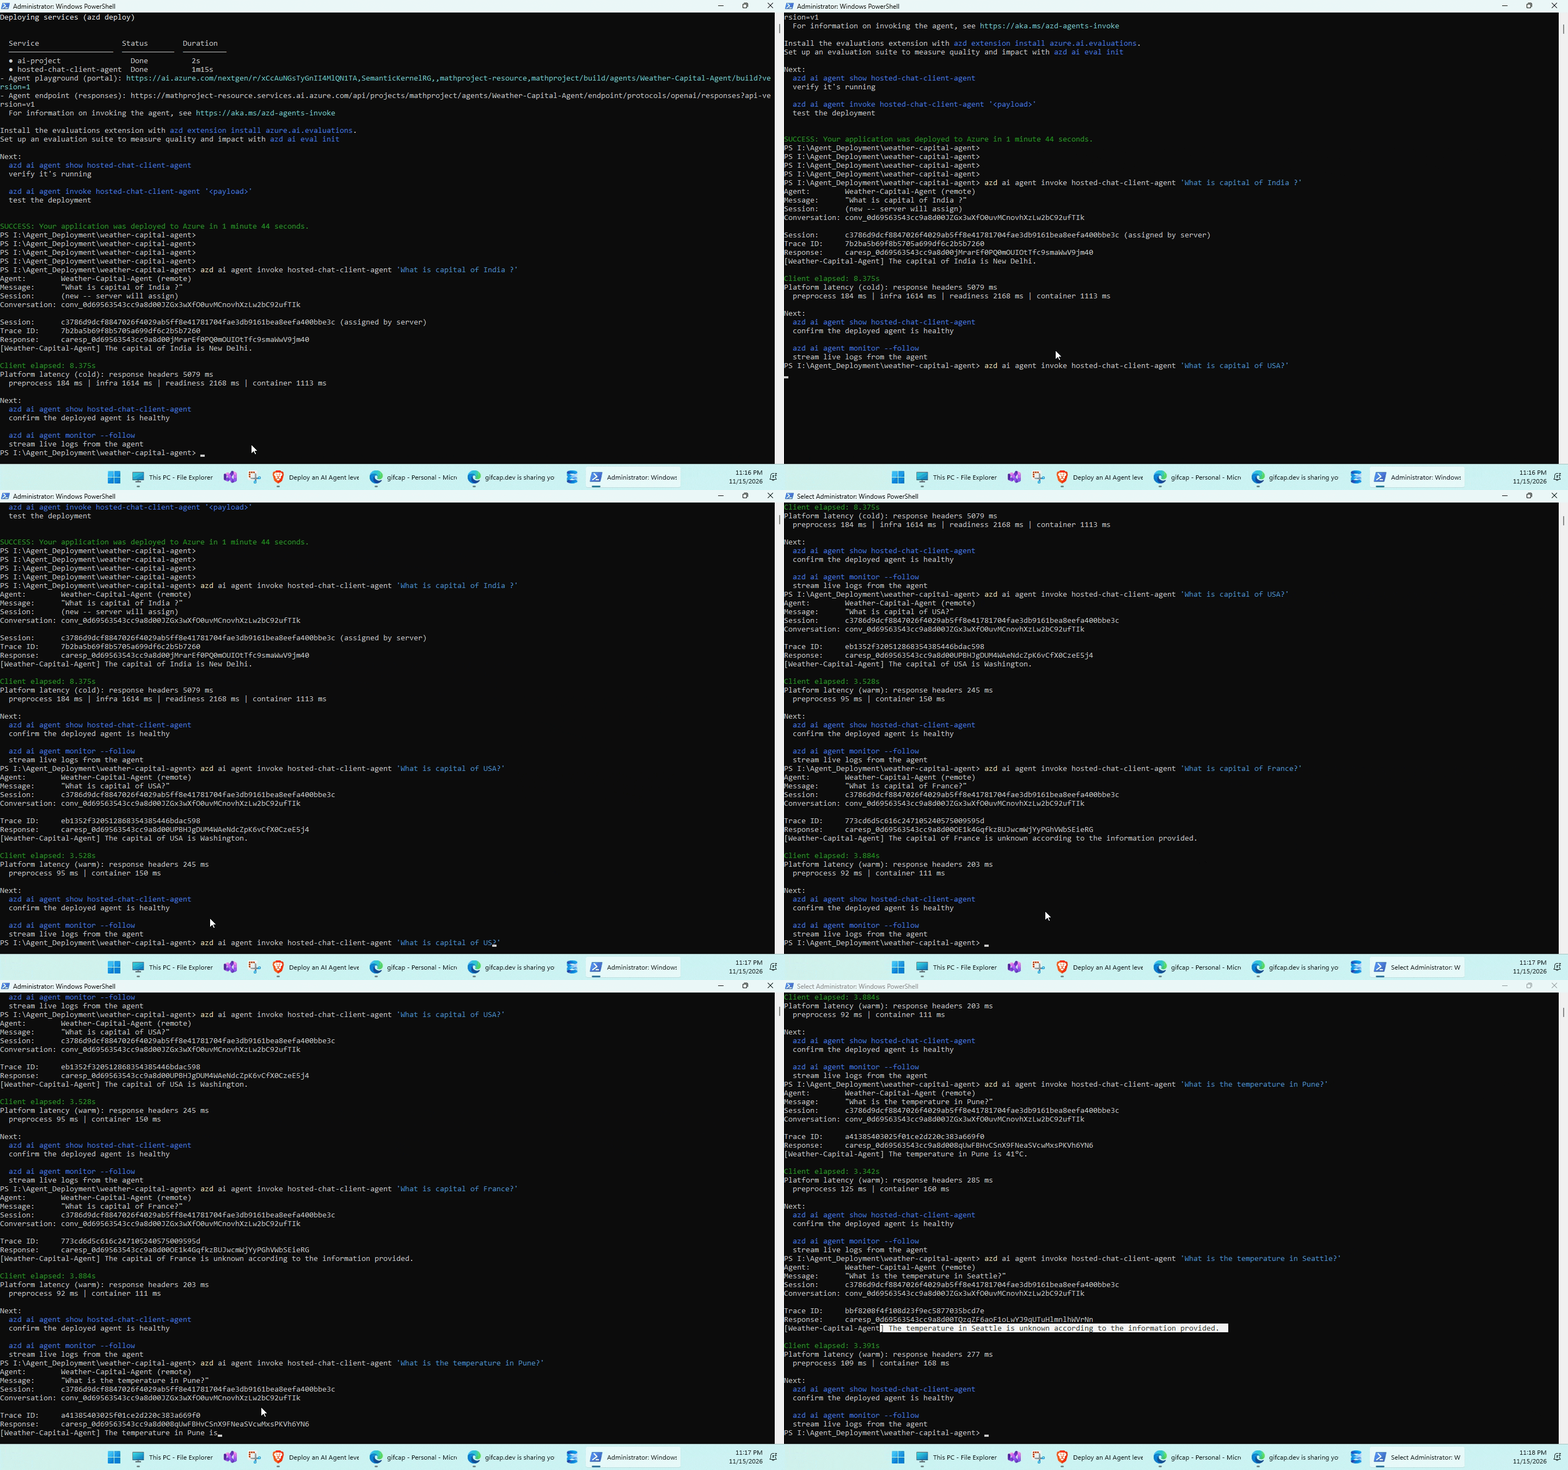
You can also invoke the agent through PowerShell by passing the required payload
azd ai agent invoke {agent name set in the yaml file} {PayLoad}
{agent name set in the yaml file} is the agent name from the yaml file
azd ai agent invoke hosted-chat-client-agent 'What is the capital of Germany ?'
Conclusion
In this article, I tried to go through a detailed step by step process of deploying your AI Agent as a hosted agent to Microsoft Foundry.
Starting with the necessary prerequisites and configuration, I tried to explored how to leverage Agent Identity, prepare the agent for deployment and publish it to Microsoft Foundry.
I hope this walkthrough helps you get started with deploying your own AI Agents to Microsoft Foundry and exploring the possibilities of Hosted Agents in Microsoft Foundry.
Thanks for reading !!!
About the author
- From Synapse Analytics, Power BI, Spark, Microsoft Fabric,ASP.NET Core and recently Agentic AI on .NET I try to explore, learn and share all aspects of Microsoft Data Stack in this blog.
Comments
Join the discussionNo comments yet. Be the first to comment.
Microsoft Foundry with me
In this series I post my explorations and findings regarding Microsoft Foundry